Water Filtration System Maintenance Tips and Tricks
Buying and installing a home water filtration unit is a great first step in providing clean and healthy water for you and your family. If you want to maintain the freshness coming from your faucet, some home water filtration system maintenance is required.
The following is a guide for maintaining the functionality of your whole home or under sink filtration system.
Basic Home Water Filtration System Maintenance Tasks
The simplest way you can guarantee filtered water is coming from your faucet is by replacing the filter. Over the duration of a filter’s life, captured sediment accumulates quickly. Whole home cartridge filters can go up to three or six months before needing to be changed, while under sink systems can use the same filter for up to six months.
The time until you need to change the filter is dependent on the quality of your water, as well as how much water you’re using.When you leave an old filter in the system for longer than that, you run the risk of having sediment flow past the filter because it can’t hold any more debris.
Ensure your water safety by always changing your water filter on a regular schedule.
How to Change an Under Sink Filter
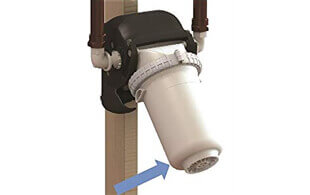
EcoPure and Whirlpool under sink filtration units make it easy to replace the filters. The encased filter technology allows for a convenient water filtration system maintenance process. Here’s how it works:
- Twist the old filter counterclockwise a quarter turn
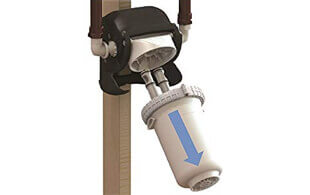
- This will release the filter allowing you to pull it out
- Twist the new filter clockwise into the slot
- Replace the system’s battery so the light doesn’t go out prematurely
- If you have a reverse osmosis system, “purge” the water from your tank by allowing it to run for a couple of hours

If you have a reverse osmosis filtration system, follow the same steps when replacing the membrane every 2 years. If you have questions or concerns about a specific system you purchased, you can find our owner’s manuals page and download the operation manual for your system.
Prefer to learn by watching videos?
Watch this video to learn how to replace your under sink water filters
Do You Need a New Under Sink Filtration System?
Browse our selection of under sink filtration systems from some of the top brands, including Brita and Whirlpool.
Shop Now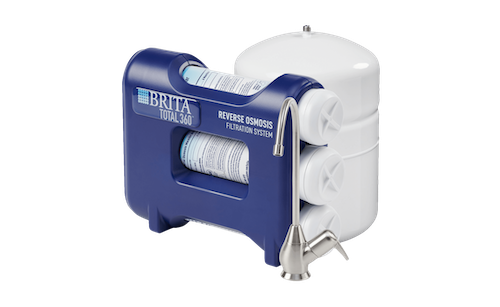
How to Change a Whole Home System’s Filter
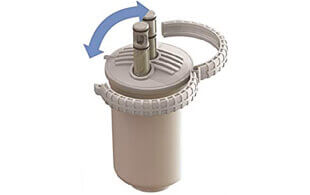
Whole home filtration systems are great for homes that have an influx of sediment in their water and it’s causing damage internally to the home’s pipes and slowing down water-using appliances. Like the under sink units, the easiest water filtration system maintenance you can perform is replacing the filter regularly. Our BRWEFS whole home filtration system has a closed sump with a lid that uses 2 latches to close. Here’s how you can change this whole home system’s filter:
1
Grasp the bottom of the sump and pivot it upward slowly
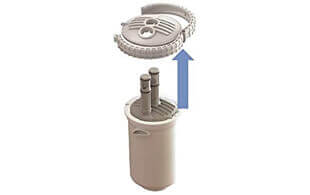
2
Pull sump down to remove from head
3
Over a sink or waterproof surface, unsnap the lid clamp by pulling the latches in opposite directions — do not remove the clamp halves
4
Detach the lid and remove the used filter cartridge from the sump
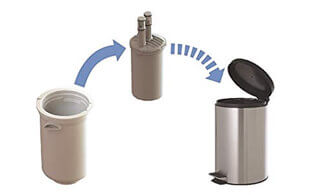
5
Throw away the old filter
Bonus
6. Check that sump is dry and free of debris
7. Remove protective caps on new filter and insert new cartridge into the sump
8. Align filter cartridge within sump ensuring the two triangular points on the filter match up with the notches in the sump
9. Attach lid, snap the latches back together, insert filter ports back into the system and pivot back to service position
Open Sump Whole Home Filter Change
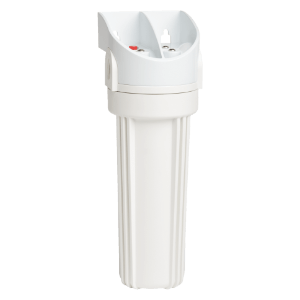
Filter changes for an open sump whole home water filtration system is a little different, but just as easy. Open sump systems can use large and standard capacity replacement filters. The filter change process is the same for each.
- Turn off water supply.
- Release pressure in the filter by pressing the vent valve on top of the filter head or by opening a cold water faucet downstream of the filter.
- Turn the sump to the left to remove from the head. Be careful, as the sump is full of water. Do not lose the large o-ring seal
- Ensure the inside of the sump is clean. If not, wash with warm soapy water; rinse.
- Remove the wrapper from the new filter cartridge and insert the filter cartridge into the sump. Some cartridges fit either way, while others fit only one way. Follow instructions on the wrapper.
- Lightly lubricate the o-ring seal, in the sump, with silicone grease. Be sure it is fully seated in the groove.
- Hold the sump up to the filter head, aligning the center hole in the cartridge with the protrusion on the bottom of the head. (If the sump will not tighten up to the head, you may have the cartridge in upside down or not centered in the sump. Take the cartridge out and check for correct orientation.)
- Being careful not to cross-thread, turn the sump to the right onto the filter head and tighten securely. Do not overtighten.
- Partially open a house faucet downstream of the filter housing. Then, slowly open the water supply shutoff valve and allow the filter housing to fill with water. While it is filling, press the filter vent valve to release air in the filter.
- Close the faucet. Then, check for leaks between the sump and the head.
Whether you’re working with an open or closed sump, new whole home filters need to be purged to release the loose material in the new filter. You can do this by running a faucet in your home for at least 5 minutes. If you have more troubleshooting questions, you can go to our owner’s manuals page to find the right fix for your system’s maintenance issue.
Whole Home Water Filtration System Maintenance
Whirlpool and Brita Central Water Filtration systems require little to no maintenance. The internal filter is programmed to cleanse itself every 14 days. It flushes, cleans and drains the filter so you don’t have to install a new one.
The only real water filtration system maintenance you have to perform is when the weather dips or it’s not being used for more than a month.
Whole Home Filtration System Maintenance Before Vacation
If your home will be unoccupied for more than a month, there are several things you can do.
First, you can turn off your home’s water so the filtration unit doesn’t receive any more water. You should also turn off the Clean Rinse function so the same water isn’t filtered every 14 days. If you choose to turn off the Clean Rinse function, we recommend running two filtration cycles manually when you return home and use the water.
Another option you have is unplugging your unit and draining the excess water from the system. This step should always be taken if there is potential for the water inside the unit to freeze.
How to Prevent Your Water Filtration System From Freezing
If your Central Water Filtration system is located in a summer cabin or lake home, you run the risk of the water freezing in the system if it isn’t properly drained. There is an excessive weight hazard on this unit due to its size, so you should always have two or more people helping you drain your system. Not only will this help protect you, this will protect the system from slipping out of your hands and shattering on the ground.
How to Drain Water from the Unit
- Close shut-off valve on the house’s main water pipe
- Open a faucet to allow pressure to ventilate in the unit
- Shift the stem in the bypass valve to the bypass position. If using a 3-valve bypass system, close the inlet and outlet valve, then open the bypass valve.
- Unplug the power supply and remove the cover and drain hose
- Remove holding clips at the inlet and outlet
- Separate system from bypass valve
- Lay a piece of wood at least two inches thick near the floor drain
- Move system closer to the drain and slowly tip it over until the rim is on the piece of wood with the inlet and outlet over the drain
- Do NOT let the weight of the system rest on the inlet and outlet
- Tip the bottom of the system up a few inches to drain the water
When the system is done draining, leave it laying on the piece of wood so it’s in a horizontal position and the inlet and outlet are off the ground.
When you return home and want to start using your central water filtration system again, lift the system upright and put it back in its old position. Reconnect the system to the bypass valve by following the How to Drain Instructions above in reverse order. Check to make sure all the leadwire connectors are secure and the wiring is away from the valve gear. Plug the system back into the power source. The system will automatically complete a Clean Rinse cycle and return to normal operation.
As someone who cares about their water, it’s important to keep a checklist with these water filtration system maintenance steps. Proper maintenance will allow your filtration unit to last for many years to come. If you need more maintenance tips and tricks, find your unit’s installation guide by going to our owner’s manuals page.
Do You Need a New Water Filtration System?
Browse our selection of whole home filtration systems from some of the top brands.
Shop Now